As a photographer, I know firsthand how crucial lighting is to bringing an image to life. Whether I’m basking in the warm glow of the golden hour or adjusting my settings under the harshness of fluorescent bulbs, the type of light I choose can profoundly affect my work. In this blog post, I want to take you on a journey through the world of light—specifically, the differences between natural and artificial light. Together, we will delve into their unique characteristics, explore their advantages, and uncover best practices to help you elevate your photography. Whether you’re just starting out or looking to refine your skills, understanding how to manipulate these two types of lighting can make all the difference in your creative endeavors.
Understanding Natural Light
Natural light is one of the most crucial components of photography, influencing not only the exposure of your images but also their mood and overall aesthetic. This section will explore what natural light is, how it varies throughout the day, and tips for utilizing it effectively in your photography.
What is Natural Light?
Natural light is sunlight that is not altered or artificially produced. It encompasses all variations of light produced by the sun, from the harsh midday sun to the soft glow of twilight. Understanding this spectrum of light can significantly enhance your photographic results.
Variations of Natural Light Throughout the Day
Natural light is not static; it changes throughout the day due to the position of the sun. Here’s a breakdown of how light varies during different times of the day:
- Morning (Golden Hour):
- Occurs shortly after sunrise.
- Characterized by soft, warm light that creates stunning shadows.
- Ideal for portraits with brands like Canon EOS R5 or Sony A7 III, which excel in capturing rich skin tones.
- Midday:
- The sun is high in the sky, resulting in harsh shadows and bright highlights.
- Typically considered the least favorable time for photography, especially for landscapes. Use reflectors like the Neewer 43 Inch 5-in-1 Collapsible Disc to soften the harsh light.
- Afternoon (Golden Hour):
- Another golden hour occurs before sunset, similar to morning light.
- Produces a warm tone that enhances colors in your photographs.
- Great for landscapes when using lenses like the Nikon AF-S NIKKOR 24-70mm f/2.8E ED VR to capture expansive vistas.
- Blue Hour:
- The period just before sunrise or after sunset, where the sky takes on a cool, blue hue.
- Perfect for cityscapes and architectural photography.
- Utilize a sturdy tripod, such as the Manfrotto Compact Action Tripod, to stabilize longer exposures needed during this time.
Effects of Weather Conditions
Weather significantly impacts natural light, affecting exposure, mood, and color in your images. Here’s how you can expect each condition to modify the light:
- Clear Skies:
- Bright direct sunlight leads to high contrast images.
- Great to experiment with shadows and silhouettes.
- Cloudy Skies:
- Overcast conditions result in diffused light, reducing shadows and softening colors.
- Ideal for portrait photography, as shown in shoots using the Fujifilm X-T4, which excels in low-light conditions.
- Rainy Weather:
- Rain can create unique reflections and saturated colors.
- A clear umbrella, like the Repel Windproof Travel Umbrella, can enhance the aesthetic by allowing you to shoot comfortably in light rain.
- Golden/Sunset Light:
- It casts a rich, warm glow on subjects and landscapes, making them appear ethereal.
- Experimenting with film-like cameras like the Leica Q2 can yield stunning results due to their high dynamic range.
Tips for Utilizing Natural Light Effectively
To take full advantage of natural light, consider the following practical tips:
- Use Reflectors:
- Boost the light on your subjects by using reflectors, such as the Lastolite Vintage Collapsible Reflector, to control bounce.
- Observe the Shadows:
- Pay attention to how shadows are cast and adjust your composition accordingly. Side-lighting can add dimension.
- Master the Histogram:
- Use your camera’s histogram feature to gauge exposure and ensure you’re capturing the full range of tones.
- Plan with Apps:
- Utilize apps like Sun Surveyor or Photopills to track the sun’s position at different times and plan your shooting schedule accordingly.
- Experiment with Angles:
- Don’t hesitate to change your perspective. Positioning yourself at different angles relative to the natural light source can yield drastically different results.
| Time of Day | Light Characteristic | Best Equipment |
|---|---|---|
| Morning | Soft, warm light | Canon EOS R5 |
| Midday | Harsh, bright light | Neewer Collapsible Reflector |
| Afternoon | Warm golden tones | Nikon 24-70mm F/2.8 |
| After Sunset | Cool blue hues | Manfrotto Tripod |
| Overcast | Diffused light | Fujifilm X-T4 |
By understanding and harnessing the nuances of natural light, photographers can create images that are not only technically proficient but also rich in emotion and beauty.
What is Artificial Light?
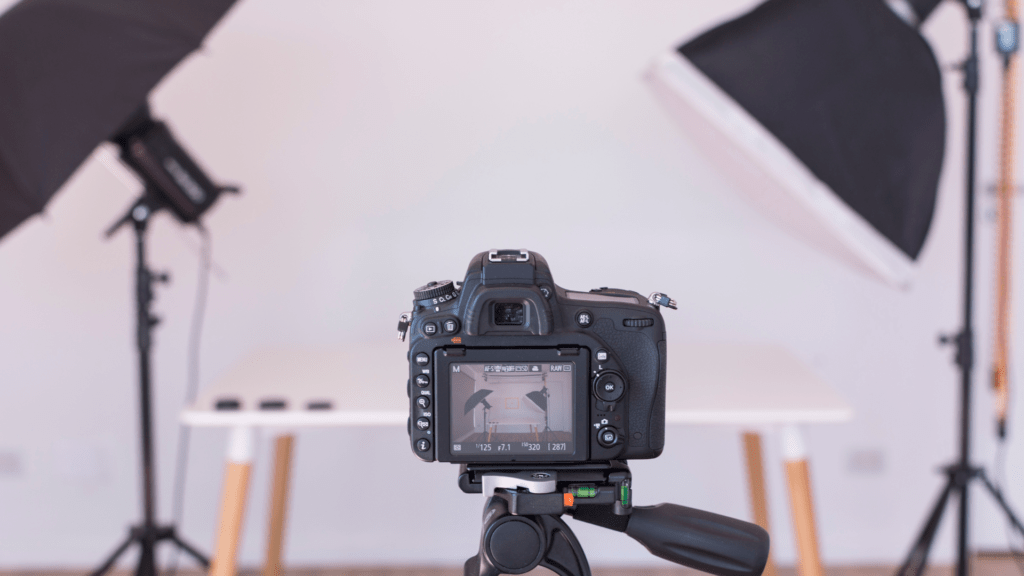
Artificial light refers to any light source that is not naturally occurring, meaning it is created by human intervention. In photography, artificial light can play an essential role in achieving the desired exposure and mood in your images. It encompasses a wide range of lighting solutions, including continuous lighting setups, flash units, and LED panels, which can drastically change how a scene is captured.
Types of Artificial Light
When it comes to artificial lighting in photography, there are two primary categories: continuous lighting and flash.
Continuous Lighting
Continuous lighting refers to fixtures that provide a constant source of light. Photographers can see the light’s effect in real-time, making it easier to adjust angles and distances. Common continuous lighting options include:
- Tungsten Bulbs: These traditional hot lights offer a warm color temperature (around 3200K) but can generate a lot of heat. Examples include the Lowel Tota-Light and the Westcott 5000K 5-Light Kit.
- Fluorescent Lights: These are more energy-efficient and produce less heat but may require color correction gels to achieve the desired color temperature. Popular choices include the Neewer 660 LED Video Light.
- LED Lights: Fast becoming the choice of many photographers, LED lights offer versatility and very little heat emission. A well-known product in this category is the Godox SL-60W.
Flash
Flash photography involves the use of brief, intense bursts of light, typically triggered by the camera. This method helps freeze motion and offers the ability to control light ratios. Flash options include:
- Speedlights: Compact and portable, speedlights like the Nikon SB-700 or Canon Speedlite 600EX II are ideal for on-the-go shooting or creative portraits.
- Studio Strobes: More powerful and suitable for studio settings, models like the Profoto B10 or Godox AD200 can provide professional-grade lighting setups.
Pros and Cons of Using Artificial Light
Understanding the advantages and disadvantages of artificial lighting is crucial for photographers to make informed decisions about their lighting setups.
| Pros | Cons |
|---|---|
| Control: Offers precise control over lighting conditions. | Equipment Costs: Initial setup can be expensive. |
| Consistency: Provides consistent lighting across shots. | Portability: Some setups can be cumbersome to transport. |
| Versatility: Enables diverse creative effects. | Learning Curve: Requires understanding of lighting ratios and placements. |
| Avoiding Natural Limitations: Allows shooting in low-light conditions. | Power Source Dependency: Many continuous lights require a power outlet. |
Practical Advice for Incorporating Artificial Light
When to Use Artificial Light
- Low-Light Conditions: Artificial lighting is invaluable in scenarios where natural light is scarce, such as indoor events or night photography.
- Portrait Photography: To highlight your subject and eliminate unflattering shadows, using softboxes like the Godox Softbox Kit can create even, flattering light.
- Product Photography: Consistent lighting is essential for catalog photography. Using an LED light box, such as the Neewer Photo Studio Light Box, can help achieve professional results.
How to Use Artificial Light
- Experiment with Light Placement: Timing and location can affect the quality of artificial light. Try placing lights at different angles to see how they change the mood of your images. Using a simple three-point lighting setup with one key light, a fill light, and a backlight can help you understand this better.
- Use Diffusion Materials: Soft diffusion materials (like those found in the Aputure Light Dome II) can soften harsh light, giving your images a more pleasing aesthetic.
- Balance Artificial with Natural Light: Combining both natural and artificial light can create a dynamic photo. For example, during golden hour, supplementing with a speedlight can add extra fill light to your subjects’ faces without overpowering the ambient light.
- Take Control with Light Modifiers: Use external modifiers like reflectors (e.g., the Neewer Collapsible Disc) to bounce light back onto your subject, creating fill light and reducing shadows.
By understanding the types of artificial lighting available, the pros and cons of each, and practical methods for implementation, photographers can take full advantage of artificial light to elevate their work and creatively express their vision.
Key Takeaways
- Select the Right Tool: Choose between continuous lighting or flash based on your shooting environment.
- Invest Wisely: Familiarize yourself with specific products that suit your budget and needs.
- Practice and Experiment: The more you experiment, the more you will grasp the intricacies of artificial lighting.
By mastering the use of artificial light, photographers can not only enhance their technical skills but also harness endless creative opportunities.
Natural Light vs. Artificial Light: Key Differences
When it comes to photography, light is arguably the most critical element that influences the outcome of your images. Both natural light and artificial light have their unique characteristics and applications. Understanding their distinctions can help photographers choose the right lighting for their artistic vision.
Color Temperature
Color temperature is measured in Kelvin (K) and indicates the warmth or coolness of light.
Natural Light
- Color Temperature Range: Generally, natural light ranges from about 5,000K (sunny day) to 10,000K (overcast sky).
- Warmth: Natural light tends to be cooler in shade and closer to neutral at noon.
- Example: Golden Hour (shortly after sunrise or before sunset) offers a warm tone that many photographers strive for, typically around 2,000K to 3,000K.
Artificial Light
- Color Temperature Range: Common artificial light sources, like incandescent bulbs, offer around 2,700K (warm white), while daylight-balanced LEDs range from 5,000K to 6,500K.
- Versatility: Brands like Neewer, with their LED Video Lights, provide adjustable color temperatures that allow for customization based on shooting conditions from 3,200K to 5,600K.
| Light Type | Color Temperature (K) | Warmth |
|---|---|---|
| Natural Light | 5,000K – 10,000K | Varies |
| Artificial Light | 2,700K – 6,500K | Mostly Warm |
Intensity
The intensity of light refers to its brightness.
Natural Light
- Variability: Natural light intensity fluctuates throughout the day. Midday sun provides harsh, strong lighting, while early morning or late afternoon light offers softer intensity.
- Example: Photographers often prefer shooting on cloudy days because the clouds diffuse sunlight, creating softer shadows and a more flattering light for portraits.
Artificial Light
- Control: With products like the Godox AD200Pro, photographers can control light intensity through high-output flash settings.
- Modifiers: Using light modifiers such as softboxes, umbrellas, or reflectors, help manage and soften the intensity of artificial light.
| Light Type | Intensity Variability | Control Level |
|---|---|---|
| Natural Light | Varies throughout the day | No control over intensity |
| Artificial Light | Can be adjusted with diffusers | High control over intensity |
Direction
The direction of light is crucial and affects shadows and highlights in images.
Natural Light
- Directionality: The direction of natural light changes with the sun’s position. Early morning light casts long shadows, while overhead sun creates high contrast.
- Example: Side lighting from a window using natural light can create dramatic and three-dimensional images, ideal for product photography.
Artificial Light
- Flexibility: With artificial light, the phototgrapher has substantial control over direction by positioning lights where needed.
- Examples: A ring light, such as the Ring Light 18-Inch by Neewer, provides uniform lighting from the front, minimizing harsh shadows, making it suitable for beauty shots and vlogging.
| Light Type | Directionality | Flexibility |
|---|---|---|
| Natural Light | Changes with the sun’s position | Limited control |
| Artificial Light | Can be positioned and angled | High flexibility and control |
Emotional Impact and Atmosphere
The type of light used can greatly influence the mood of your photographs.
Natural Light
- Mood Quality: Natural light tends to create a more organic feel, evoking a sense of realism and warmth, often used in intimate or lifestyle photography.
- Example: Photographers use the Canon EOS R6 in natural light conditions to capture stunning landscape images with true-to-life colors.
Artificial Light
- Stylization: Artificial light can be molded to achieve dramatic effects or cinematic looks.
- Example: The Aputure Light Storm 120D allows for focused light with the ability to change the atmosphere, making it ideal for film and portrait photography.
| Light Type | Emotional Impact | Typical Applications |
|---|---|---|
| Natural Light | Organic and warm | Lifestyle, landscape photography |
| Artificial Light | Dramatic or stylized | Film, portraits, product photography |
Understanding the nuances of natural versus artificial light, including their color temperature, intensity, direction, emotional impact, and practical applications, empowers photographers to make informed choices that enhance their creative expression.
Which Illuminates Your Life Better?
In conclusion, the debate between natural light and artificial light in photography is nuanced, with each offering distinct advantages and limitations. By recognizing their unique characteristics and experimenting with both, I can discover how each lighting type influences my creative expression. Ultimately, the key is to find a balance that aligns with my artistic vision, allowing for the development of a signature style that reflects my personal approach to photography.


Natural light is just way better for photos. Can’t beat that golden hour! 📸
Too much artificial light gives me headaches. I guess I’m just a sunlight person! 🌙
Great article! I never thought about how these two types of light impact our health differently.
Artificial light can be a real lifesaver during winter, though. Gotta love those cozy vibes! ✨
Does anyone else feel more productive with natural light? It totally boosts my mood!
I read that artificial light can mess with our sleep cycles. Yikes! 😱
Isn’t it amazing how light affects our energy levels? I need more sun in my life! ☀️
I love how natural light makes everything feel so much warmer and inviting! 🥰